
— — — — —
— — — — —
— — — — —
— — — — —
— — — — —
— — — — —
— — — — —
— — — — —
The purpose of this guide is to give a quick, high-level run-through of the game creation process. We will be using the example content bundled with the software rather than creating any custom content. If you are interested in a more in-depth guide that includes the creation of custom content, check out the other Getting Started guide, Creating a Custom Game from Scratch.
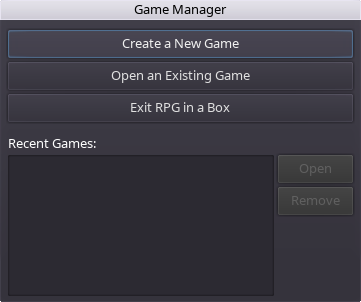
When RPG in a Box is first launched, the Game Manager dialog is displayed. The Game Manager allows you to either open an existing game project or create a new one. In this guide we are creating a new game project, so click on the “Create a New Game” button at the top.
Once you indicate that you want to create a new game, the “Create a New Game” dialog will display. This dialog is where you will specify some initial settings for your project. Click the “Browse” button and navigate to a location where you'd like to store your project's files. It is recommended to create a new folder for your project. Here you will also specify a name for your game and whether you want to import the example content. Ensure that the “Import example content checkbox” is checked since we want to use the example content for this project. Click OK to proceed once everything is set.

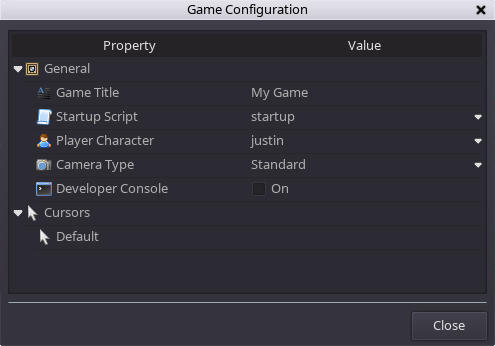
The application will then copy the example content into your project folder and the Game Explorer will refresh to show your game's resources. We will not be creating any new content in this guide, but to help you become familiar with some of the resources we'll view a few examples. Directly underneath your game's name in the Game Explorer, you should see an item named Game Configuration. This is where general settings for your game are stored. Double-click on this item to open the Game Configuration dialog and see some of the settings that can be modified.
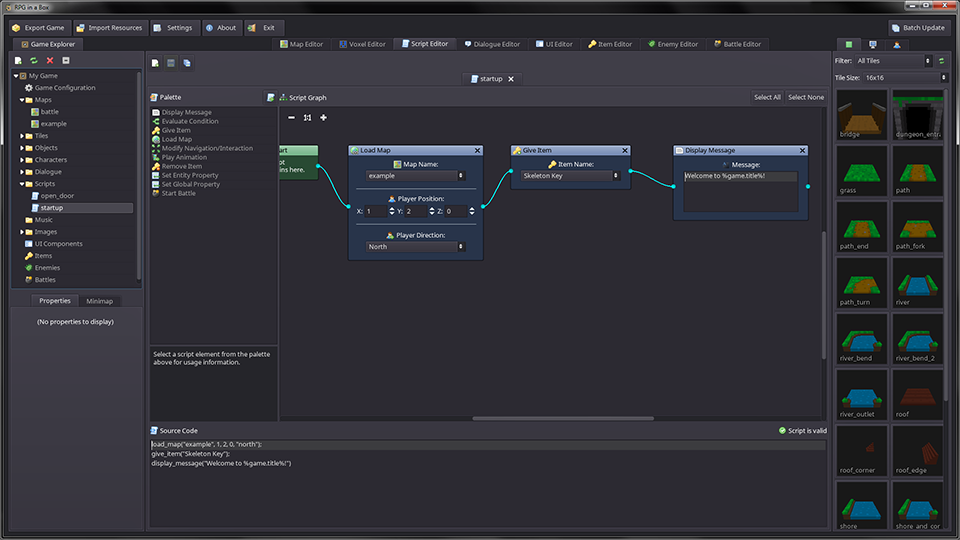
When your game first starts, it executes the startup script that is specified in the game's configuration. In this case, that is a script aptly named “startup”. Close the Game Configuration dialog then expand the “Scripts” folder in the Game Explorer and double-click on the script named “startup”. This will open the script in the Script Editor. As you can see, the example startup script loads the map named “example”, gives the player a skeleton key, and displays a welcome message.
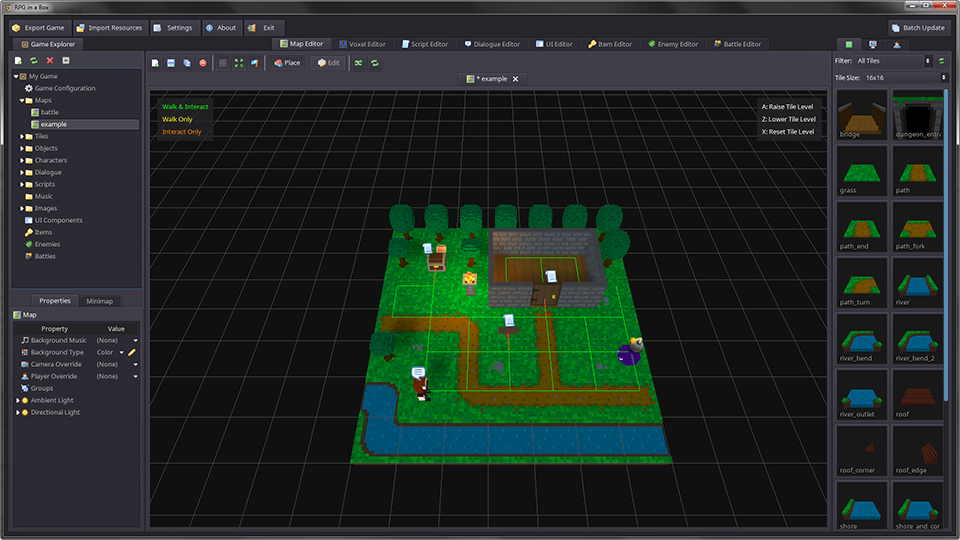
Next, expand the “Maps” folder in the Game Explorer (if it's not already) and double-click on the map named “example”. As you saw in the startup script, this is the map that will be loaded when the game starts. In this guide I won't be discussing how to edit maps, but feel free to experiment with the example map by adding a few tiles before proceeding to the next step.
Now that we've viewed the game configuration, startup script, and example map, let's export the game to try it out. On the main toolbar at the top of the application, click on the “Export Game” button. Once the “Export Game” dialog opens, click the “Browse” button and create a new folder to use as the destination. Once the export destination path is set, select the appropriate target platform from the dropdown. In this case, you would want to select the platform you are currently running on. If you have previously exported your game to this location for same platform, you can check the “Export data only” checkbox to have the application only copy your resource package and skip the executable file. Once ready, click the OK button to proceed with the export.

Now that your game has been exported, use your system's file explorer to navigate to the destination folder that you selected in the “Export Game” dialog and double-click the “game_launcher” executable file to launch the game.

That wraps up this guide! You have successfully created and exported a game using RPG in a Box. To learn more about creating a custom game, check out the guide Creating a Custom Game from Scratch.