— — — — —
— — — — —
— — — — —
— — — — —
— — — — —
— — — — —
— — — — —
— — — — —
This is an old revision of the document!
This tutorial will explain the basics of animation in RPG in a Box and will walk through the creation of some simple character animations, one for when the character is in an idle state (i.e. standing still) and one for when the character is walking.
Note: This tutorial assumes that you already understand the basics of using the Voxel Editor to build a model.
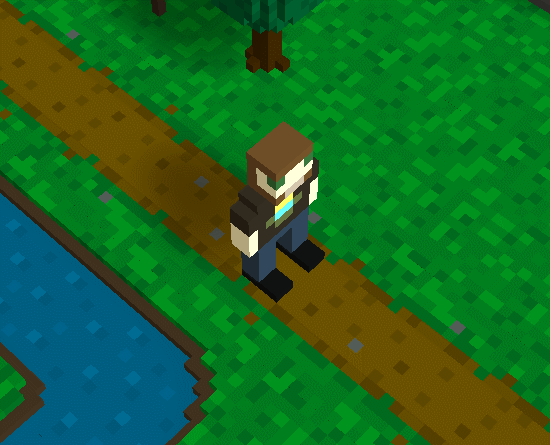
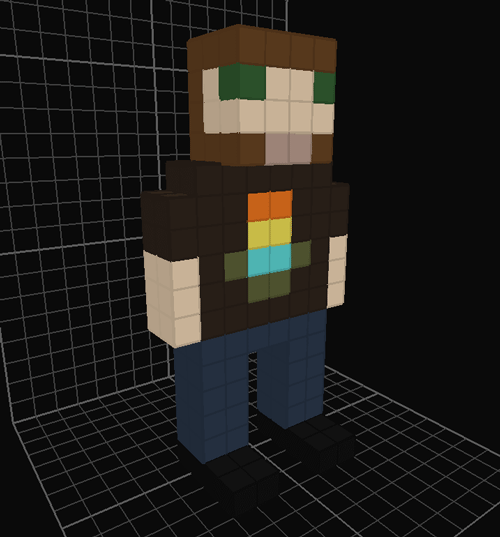
To begin, we'll need to build a the base model for our character. Open the “New Resource” dialog and create a new blank model of type “Character” in the Voxel Editor. Using the “Attach/Place Voxels” tool (and any others as necessary), build a simple human or humanoid character similar to the one shown in the image below. This will serve as the first frame of the idle animation, so they should just be in a natural standing position.
A character's idle animation is played whenever they are standing still and no other animation is active. If a character does not have one defined, the game will default to displaying the first frame of the model. Even a simple animation can add a lot of life to your game and is recommended whenever possible.
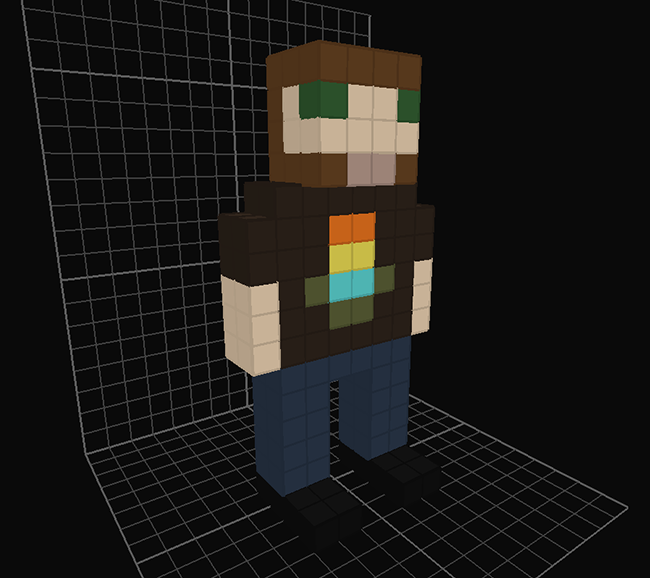
For this tutorial we'll create an idle animation having two frames, with the existing first frame serving as one of those. Click the “Duplicate Current Frame” button on the animation toolbar to make a copy of the first frame.

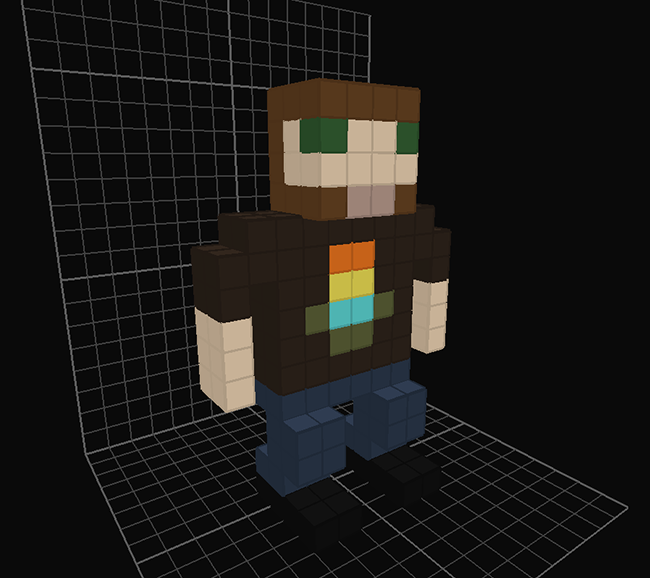
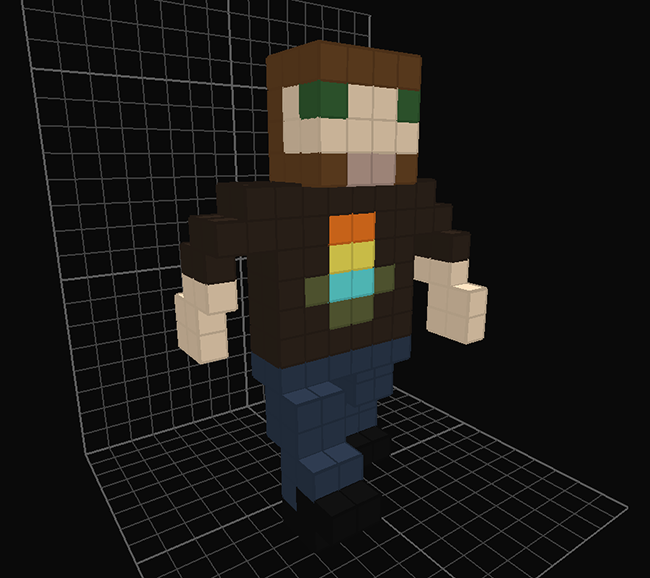
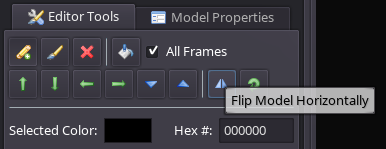
The editor will duplicate the current frame and switch the view to the new frame, in this case frame #2. Make some slight adjustments to the model, like bending the knees a bit and adding minor movements to the arms as shown in the image below. The “Shift Model Down” button ( ) on the Editor Tools panel can be useful for this as it moves the entire model down by one voxel.
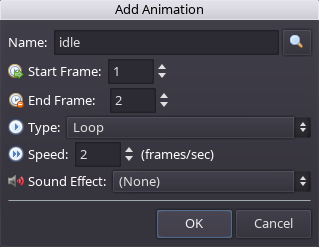
Now that we have the two idle frames, we'll need to define it as an animation. Click the “Add Animation” button on the animation toolbar.

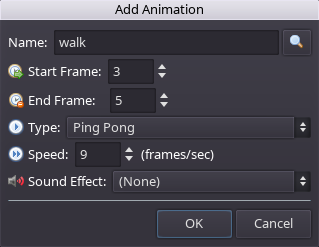
In the “Add Animation” dialog that appears, enter the “Name”, “Start Frame”, “End Frame”, “Type”, and “Speed” values as shown in the image below. See Animation Types for more information about the supported playback types. For the name, you can either type “idle” into the box yourself, or click the magnifying glass button ( ) to select from a list of predefined animation names. This list includes special names that are connected to certain behaviors and scenarios, like idling, walking, attacking, etc.
Click OK to finish defining the animation, then click the “Play” button ( ) on the animation toolbar to see the idle animation that you've created!
Click the “Play” button again to stop the animation.
A simple walk animation can be made with just 3 frames. Duplicate frame #1 and move it to the end using the “Move Current Frame Right” button on the animation toolbar. This new frame will now be frame #3 and will serve as the first frame of our walk animation.

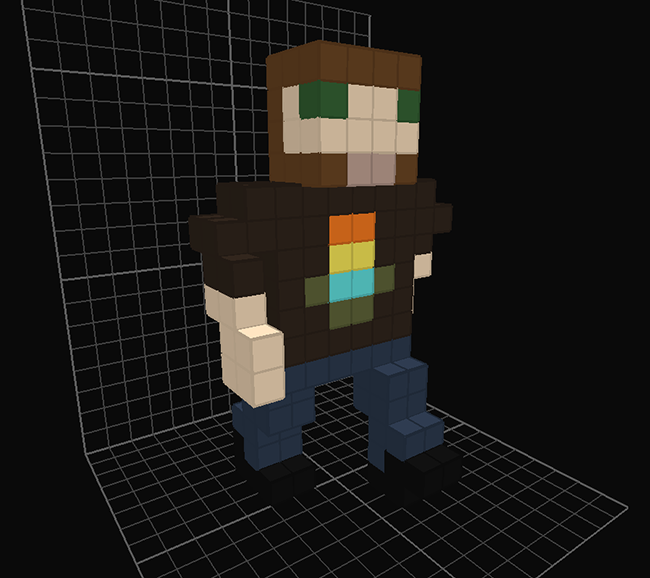
In this new frame, modify the model so one arm is angled backward and the leg on the same side is angled backward. Also make adjustments to the other arm and leg but in reverse (the arm angled forward and the leg angled backward, as shown in the image below).
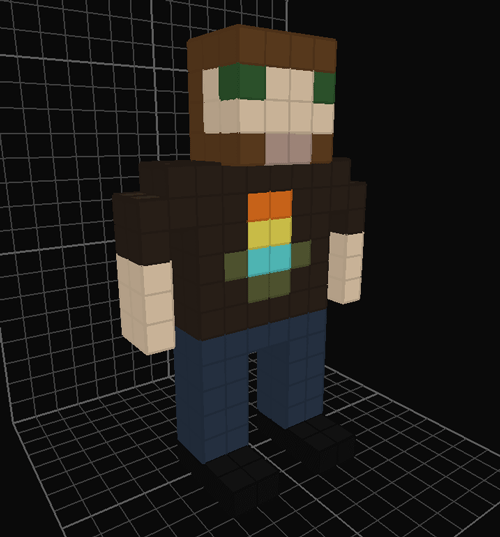
Go to frame #1 and duplicate it again, then move it to the end by clicking the “Move Current Frame Right” twice so it is now frame #4. This will be the second frame of our walk animation. The [character|character's]] arms and legs should be straight down, so you can keep the frame as is, or make some minor adjustments like moving the arms slightly away from the body as shown below.
(Third frame, duplicate of first walk frame but flipped horizontally)
(Define animation similar to idle animation)
At some point, explain how to tweak the speed as the animation is playing, may also need to be adjusted based on the character's movement speed and how it appears in-game.