
— — — — —
— — — — —
— — — — —
— — — — —
— — — — —
— — — — —
— — — — —
— — — — —
This is an old revision of the document!
Welcome to the RPG in a Box Steam Workshop documentation!
Want to jump right in and start sharing your creations with the community? Check out Stumpy's quick start video for a brief walkthrough of how to share models to the workshop:
(TBD)
Below you will find links to some step-by-step guides covering each aspect of using the workshop.
Publishing a New Asset (Step-by-Step Guide)
Use this guide if you’d like to publish an asset to the workshop for the first time.
Updating an Existing Asset (Step-by-Step Guide)
Use this guide if you’d like to update an asset that was previously published to the workshop (e.g. you added more details to a model, animated it, or would just like to upload additional images). This guide assumes that you’ve followed the “Publishing a New Asset” guide and are generally familiar with the options available.
Downloading Assets (Step-by-Step Guide)
Use this guide if you’d like to download assets from the workshop into your game project.
Deleting an Asset (Step-by-Step Guide)
Use this guide if you’d like to delete an asset that was previously published to the workshop (e.g. you uploaded the wrong model by mistake). Please note that deleting a model cannot be undone.
First, open the model that you’d like to publish in the Model Maker, then click the “Upload to Steam Workshop” button on the toolbar (the button with the Steam logo next to the “Export to External Format” button). The dialog that opens allows you to provide details about the asset you’re sharing, like the title and description. You can also assign a preview image and capture additional screenshots to help show off what you’ve made!

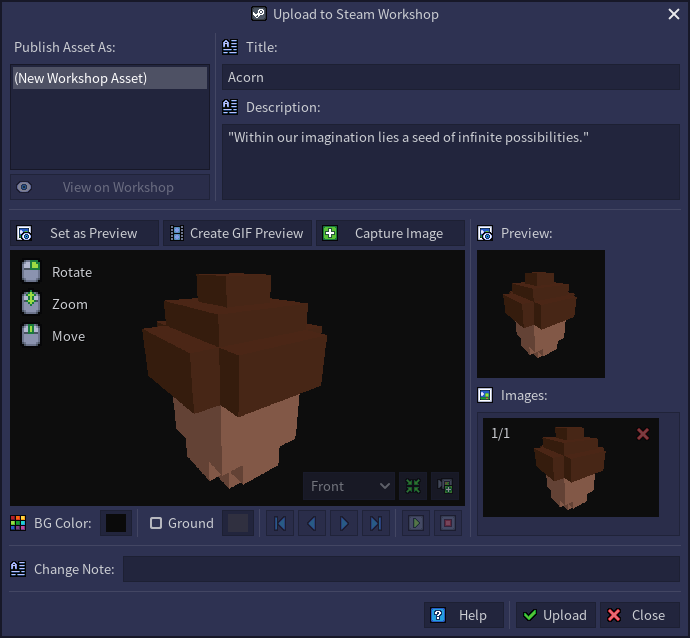
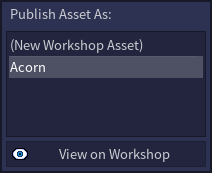
The “Publish Asset As” list at the top of the dialog should have the “New Workshop Asset” option selected by default when uploading a model for the first time. This list may have assets included in it if you’ve already published some. Leave “New Workshop Asset” selected since you’re uploading a brand new asset to the workshop. Refer to the Updating an Existing Asset guide if you’d like to make changes to a previously uploaded asset.
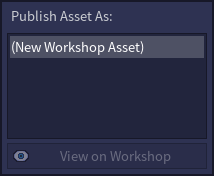
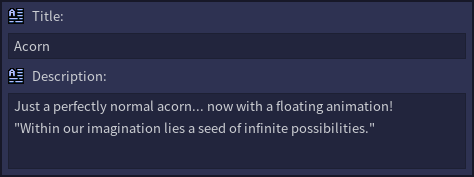
The title and description fields allow you to assign a title and description for your asset. The title is required and should be short and meaningful, with a maximum of 128 characters. The description allows for longer form text, with a maximum of 8,000 characters. The description is optional, however it can be useful for providing additional details about your asset, e.g. its intended usage, which animations are included, grid dimensions (which can be especially useful for tiles), etc.
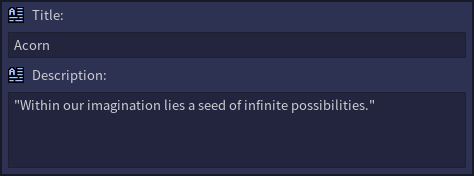
In the middle section of the dialog you’ll see some views of your model. This section allows you to customize the main preview for your asset that the community will first see when browsing the workshop. You can also capture larger additional images to include on its workshop page. You can rotate, zoom, and move the camera using the same controls as the Model Maker (right-click + drag, scroll wheel up/down, and middle-click + drag, respectively).
Set the background color to the desired color using the “BG Color” setting below the viewport. You can also toggle the ground on and off and set its color using the “Ground” setting. Play around with them and use whatever settings look best with your model!

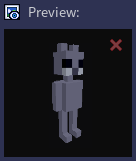
Next, decide which type of preview you'd like for others to see on the workshop: a still image, a turntable GIF where the models rotates 360 degrees, or a fixed camera GIF of one or more animations (e.g. a character walking and idling). The square viewport on the right side under the “Preview” label indicates exactly what the preview will look like on the workshop.
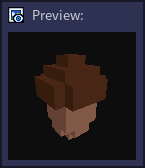
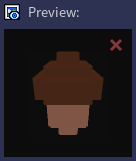
If you’d like a still image, position the model as you want it to appear, then click the “Set As Preview” button. The preview box will be locked to display what's currently shown. Clicking the red “X” button in the preview box will revert the preview back so that it’s synced to the current camera view (as it was by default).

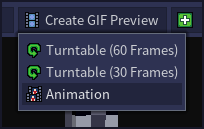
If you’d like a turntable GIF where the model will be rotated 360 degrees, position the model as you want it to appear, then click the “Create GIF Preview” button. From the dropdown menu choose the “Turntable (60 Frames)” option. The GIF will be generated and then displayed in the square preview box on the right. The “Turntable (30 Frames)” option will result in a GIF with a lower framerate and is meant as an alternative for cases where the “60 Frames” option exceeds Steam’s limit of 1 MB for preview images.
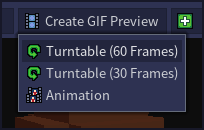
If you’d like a GIF where one or more animations are played, position the model as you want it to appear, then click the “Create GIF Preview” button. From the dropdown menu, choose the “Animation” option. A dialog will pop up where you can pick which animations you'd like to use.
To add an animation, double-click it in the “Available Animations” list or select it and press the green “Add” button. When including more than one animation, each can be added multiple times in a row to increase how long it’s played before the next one is shown. To remove an animation you added, double-click it or select it and press the red “X” button. Click OK once you’re done adding animations.
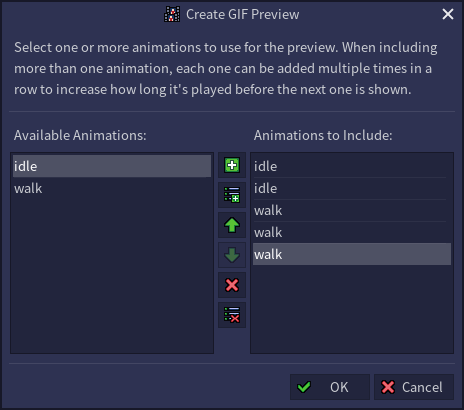
The GIF will be generated and then displayed in the square preview box on the right. If you’d like to tweak the animations, you can return to the dialog and adjust them as necessary (the selected animation list will be retained until you switch to another model).
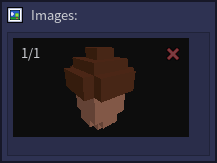
Next, decide if you’d like to capture any additional images beyond what’s shown in the “Images” section. By default, there will be a single image in this section that’s tied to the main viewport’s camera (at least one image is required for workshop assets).These images can be useful for showing up close views of the model, or other frames or camera angles to provide a better look for anyone interested in downloading it from the workshop. To capture the current view, click the “Capture Image” button. Clicking the red “X” button in the corner of an image will remove it. Any images in this list will be uploaded to the workshop at full resolution.
Before uploading the asset to the workshop, the “Change Note” field should be mentioned. This is most helpful when updating an already existing asset and is used to indicate what changes were made, for example to mention that a new animation was added. It should be noted that this will only be stored if there are changes to the model file itself (i.e. it won’t be used if the changes were only to the title, description, or images).

Once you’re happy with your title, description, preview image, and any additional images, you’re ready to upload! Click the “Upload” button at the bottom of the dialog.
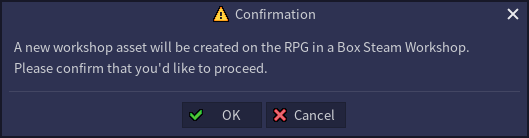
A confirmation dialog will appear to confirm that you’d like to upload the model as a new workshop asset. Click OK to continue once you’re ready.
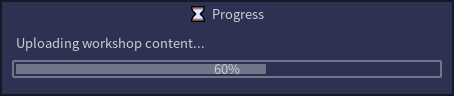
A progress dialog will appear with information about the current status as it prepares the content and uploads it to the workshop.
Once it has completed successfully, another dialog will appear to indicate this and provide the option to view the newly uploaded asset on the workshop in your Steam client. Click OK.

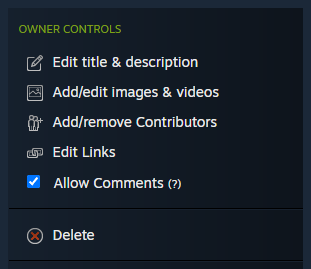
From its workshop page, you can edit its title, description, and additional images, or even delete it, e.g. if you uploaded the wrong model by mistake. Once you return to RPG in a Box, you’ll see that your asset has been added to the “Publish Asset As” list at the top left and is selected. You can easily get back to its workshop page by clicking the “View on Workshop” button underneath the “Publish Asset As” list.
Congratulations, you’ve uploaded your first asset to the RPG in a Box Steam Workshop! Thank you so much for sharing your creation, and future creations, with the community! By doing so, you’re helping others bring their stories and ideas to life. <3 If at any point you’d like to upload a new version of your model or would like to change any information or images, refer to the Update an Existing Asset guide below.
Before proceeding, it’s recommended that you read through the Publishing a New Asset guide if you haven’t yet, even if you’ve published an asset before. It covers important information about the various options that are available to use when uploading an asset.
First, open the model that you’d like to update on the workshop in the Model Maker, then click the “Upload to Steam Workshop” button on the toolbar (the button with Steam logo next to the “Export to External Format” button). This will open the “Upload to Steam Workshop” dialog. This dialog allows you to upload a new version of the model and update any information, like the title and description. You can also modify the preview image and additional screenshots to help show off the latest version of your model!
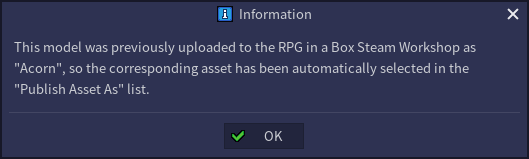
The “Publish Asset As” list will be populated with a list of any assets you’ve previously uploaded to the workshop. If you’ve uploaded the current model to the workshop before, the corresponding asset in this list will be automatically selected and a popup dialog will appear to notify you of this. If not, but you’d like to replace a previously published asset with the current model, select it in the list of published assets.
If desired, update the title and description if there are any additional details you’d like to include about the latest version of your asset.
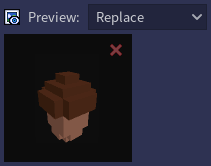
By default, the original preview image for the asset will be kept. If you’d like to update the preview (e.g. you added more details to the model or animated it), select “Replace” from the dropdown in the “Preview” section. When the “Replace” option is selected, the preview box will now display the current camera view. You can either use the camera view to determine how the new preview will look, or you can use the “Set as Preview” or “Create GIF Preview” button as explained in the Publishing a New Asset guide. In this example, I made a GIF of a newly made floating animation for the acorn, created so it will look better when used as an “Item Pickup” thingy.
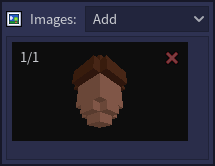
Similar to the preview image, any additional images for the asset will also be kept by default. If you’d like to add more images or replace the existing ones, select “Add” or “Replace” from the dropdown in the “Images” section. If the “Add” option is selected, any images in the “Images” section will be added to the existing ones on the workshop. If the “Replace” option is selected, any existing images for the asset on the workshop will be removed and replaced with those in the “Images” section. In this example, I’ve captured one new image of the acorn and selected “Add” from the dropdown so it will be added to the one existing image.
Enter some useful information into the “Change Note” field to indicate what was changed since it was last uploaded. For example, if you added a walk animation to a character or added some flowers to a grass tile, mention this in the change note so others will know what was changed.

Once you’re happy with your title, description, preview image, and any additional images, you’re ready to upload! Click the “Upload” button at the bottom of the dialog.
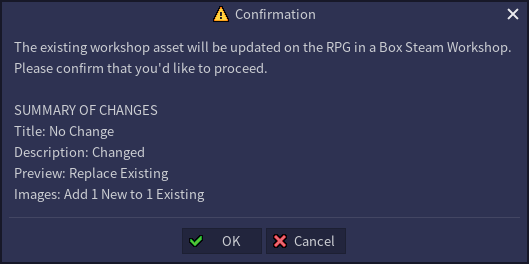
A confirmation dialog will appear to confirm that you’d like to update the model on the workshop, with a summary of the changes that will be made. Click OK to continue once you’ve verified that the changes look correct.
A progress dialog will appear with information about the current status as it prepares the content and uploads it to the workshop.
Once it has completed successfully, another dialog will appear to indicate this and provide the option to view the asset on the workshop in your Steam client. Click OK.
From its workshop page, you can edit its title, description, and additional images. Once you return to RPG in a Box, you can easily get back to your asset’s workshop page by clicking the “View on Workshop” button underneath the “Publish Asset As” list at the top left.
Congratulations, you now know how to update an existing asset on the workshop!
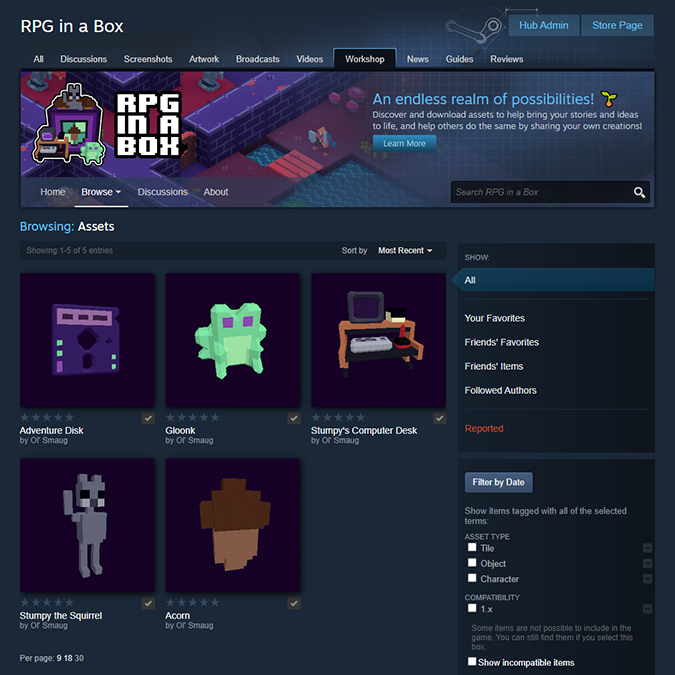
Downloading assets from the workshop and into your game project is very simple! First, go to the RPG in a Box Steam Workshop to view everything that’s been uploaded by the community. A button is available within RPG in a Box to open the workshop in your Steam client (as mentioned in the next step), or you can go to the Community Hub for RPG in a Box on Steam and click the “Workshop” tab at the top. Assets can be filtered by clicking on a type (Tile, Object, or Character) on the right-hand side of the page under “Asset Type”.
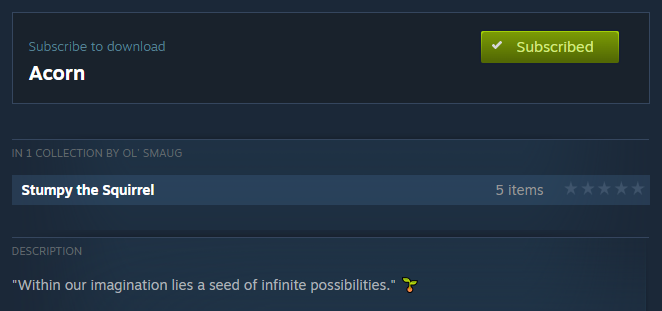
Clicking on an asset’s preview will take you to the detail page for it. From there, click the green “Subscribe” button to subscribe to the asset. Once subscribed, Steam will automatically download the asset so that it’s available to RPG in a Box.
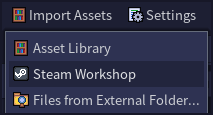
Next, open your project in RPG in a Box, then click the “Import Assets” button on the main toolbar along the top of the application. Choose “Steam Workshop” from the dropdown menu. This will open the Steam Workshop tab of the “Import Assets” dialog.
Upon opening, it will automatically start populating the center section with preview images of any assets that you’re currently subscribed to.
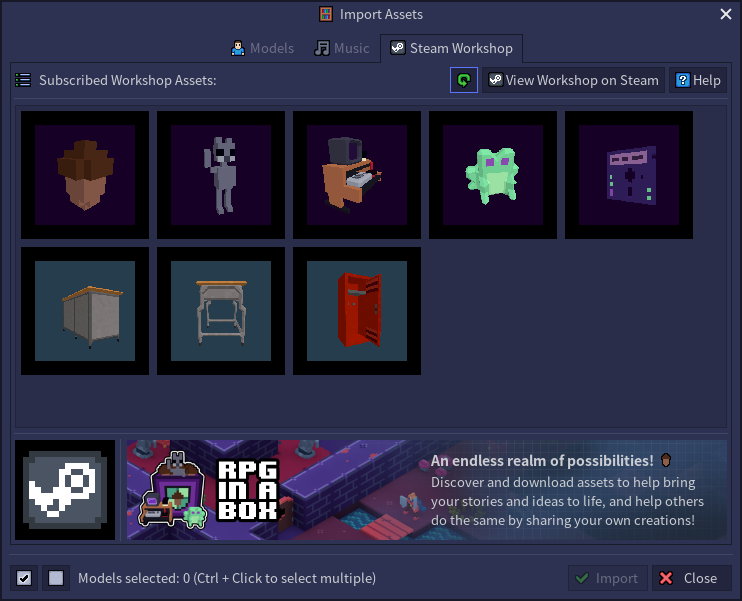
If you were already on this tab when you subscribed to an asset, you can click the “Refresh” button at the top. You can easily return to the workshop in your Steam client by clicking the “View Workshop on Steam” button next to the “Refresh” button.

Hover over an asset to see a tooltip containing its title, or click on it to see its title and description in the bottom section of the dialog. When an asset it selected, you can click the “View on Workshop” button to open the workshop page for that asset in your Steam client.

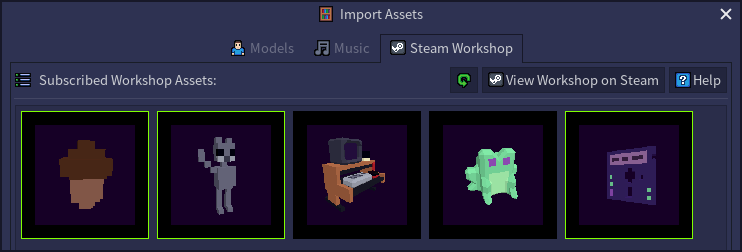
Select one or more assets that you’d like to import into your game project. Holding the Ctrl key while clicking will allow you to select multiple assets.
The two checkbox buttons at the bottom (next to the text showing the number of models selected) can be used to select everything at once or clear all of the selected models.

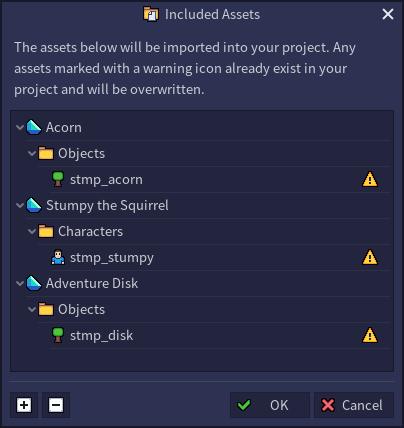
Once you’ve selected the desired assets, click the “Import” button at the bottom to import them into your project. A dialog will appear to display a list of files included with each asset. A warning icon will be displayed next to any assets that already exist in your project and will be overwritten. Click OK to proceed once you’ve checked the list of assets.
Once the chosen assets have been downloaded and imported into your project, a dialog will appear indicating that it has completed successfully. You can now use them in your project! Be sure to give credit to anyone whose assets you’ve included in your game, especially if they’ve requested on their workshop page to be credited. Now go have fun making games with your newly downloaded assets!
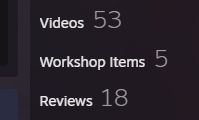
Open your Steam profile page, then click “Workshop Items” on the sidebar to the right.
Choose “RPG in a Box” from the “Filter by game” dropdown at the top.

Find the asset that you’d like to delete, then click on it to open its detail page.
In the “Owner Controls” section on the sidebar to the right, click “Delete”, then click OK to confirm. Please note that this is permanent and cannot be undone!